Chapter 4.9 - 一个简单的多任务内核实例
Created by : Mr Dk.
2019 / 08 / 01 21:54
Nanjing, Jiangsu, China
4.9 一个简单的多任务内核实例
4.9.1 多任务程序结构和工作原理
内核实例由两个程序构成:
- 引导启动程序
boot.s:系统上电时,从启动盘上把内核代码加载到内存中 - 内核程序
head.s- 两个在特权级 3 上运行的任务
- 在屏幕上显示字符的系统调用
boot.s 编译出的代码共 512B,存盘在软盘映像文件的第一个扇区中。ROM BIOS 会将启动盘第一扇区加载到物理内存 0x7c00 处,把执行权转移到此处,开始运行 boot 程序代码。
boot 程序的主要功能:
利用 ROM BIOS 中断 int 0x13 将 head 代码读入内存
0x10000(64KB) 处将这段代码移动到内存 0 处
不能直接将 head 代码读到内存 0 处,因为加载操作需要用到 ROM BIOS 的中断,而中断向量表正好位于内存 0 处,且内存 1KB 开始处是 BIOS 程序使用的数据区。
设置好临时 GDT 表,设置 CR0 PE 进入保护模式
跳转到内存 0 处开始执行 head 代码
head 程序运行在 32-bit 保护模式下,包含:
- 初始化代码
- 重新设置 GDT
- 设置系统定时器芯片
- 重新设置 IDT 表,并设置时钟和系统调用的中断门
- 跳转到任务 A 中
- 时钟中断 int 0x08 的处理程序
- 系统调用中断 int 0x80 的处理程序
- 任务 A 和任务 B 的代码数据
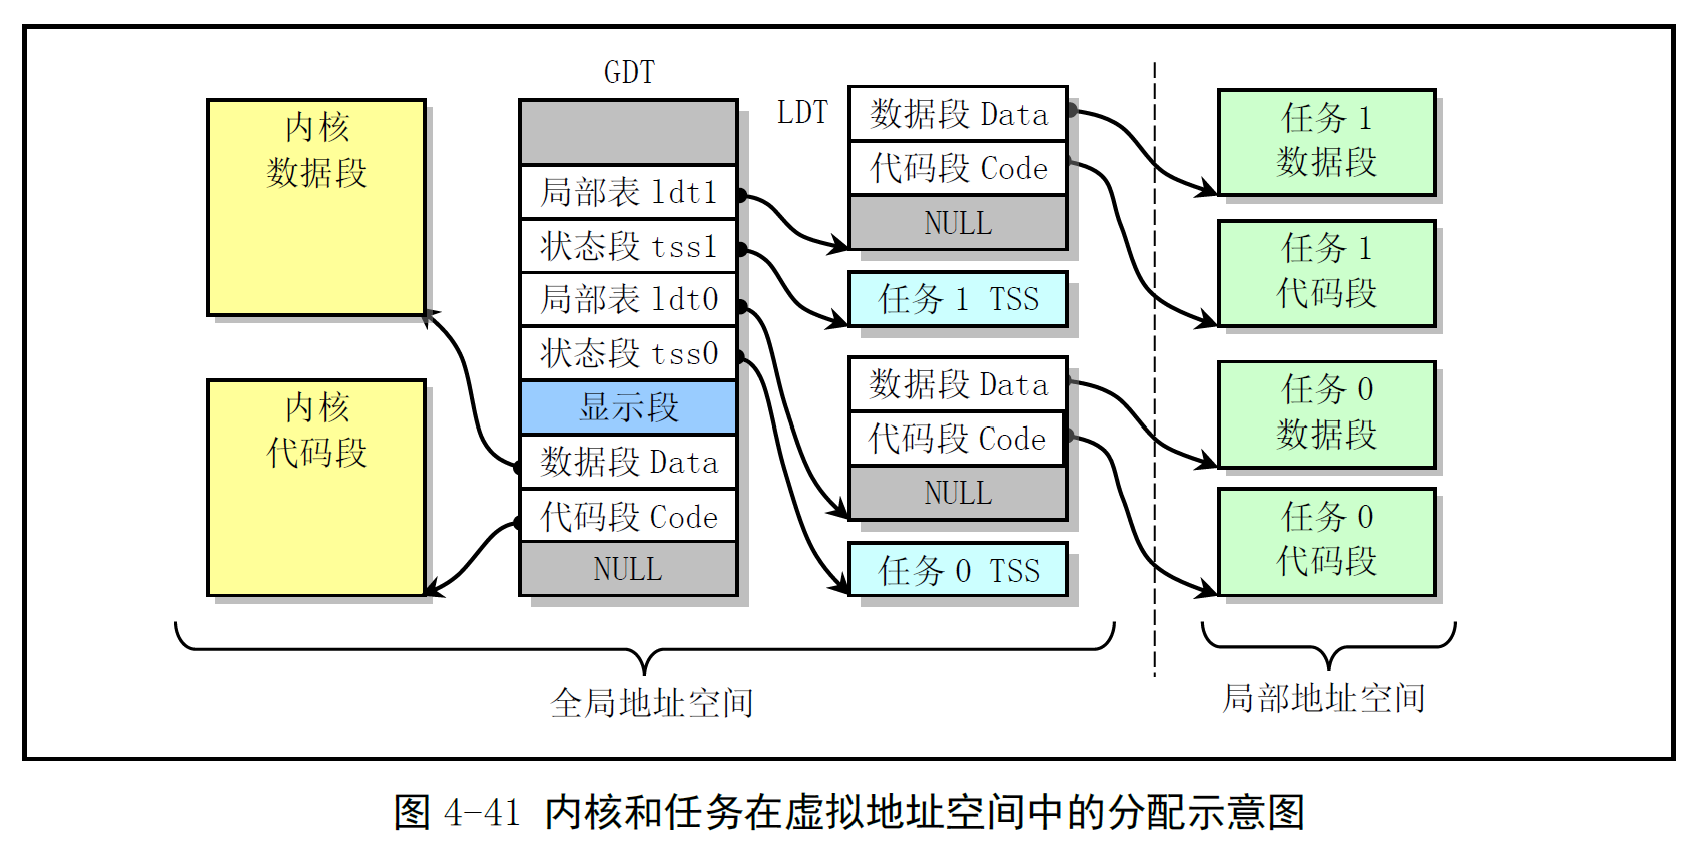
虚拟地址空间分配:
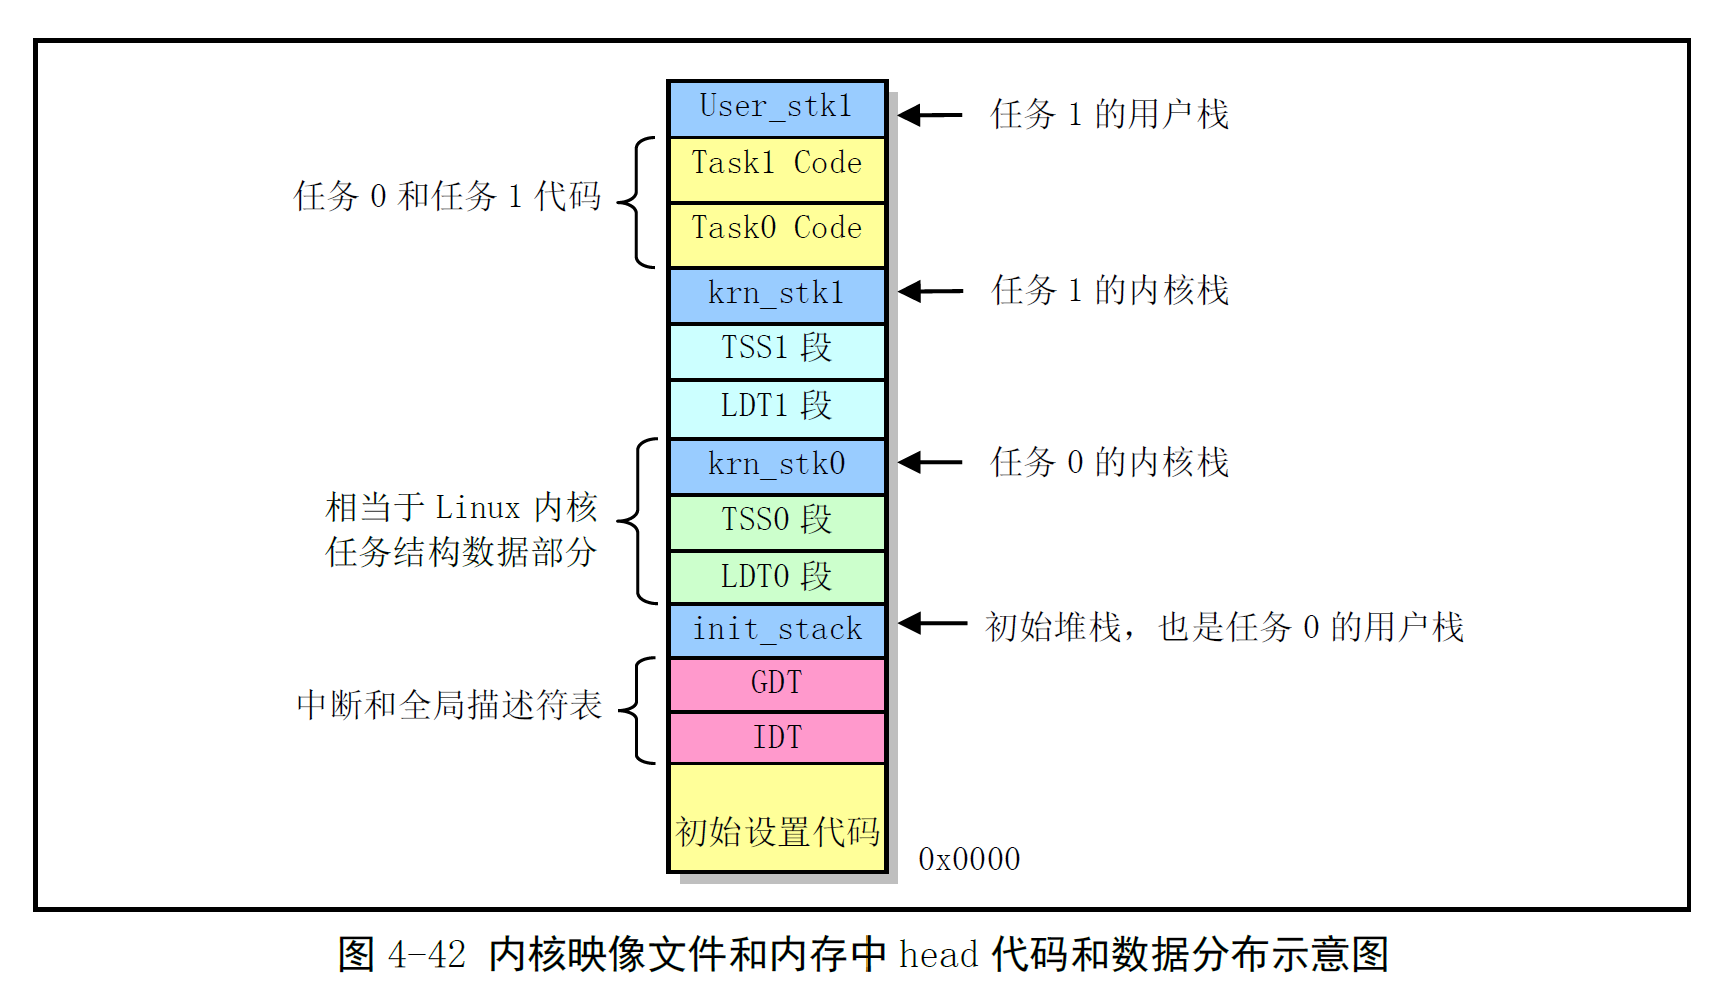
最终的映像文件组织方式:
在初始化结束后,利用 IRET 指令来启动运行第一个任务。因为控制权不能从特权级 0 的代码直接转移到特权级 3 的代码中。在初始堆栈中人工设置一个返回环境
- 将任务 0 的 TSS 段选择符加载到 TR,LDT 段选择符加载到 LDTR 中
- 将任务 0 的用户栈指针、代码指针、EFLAGS 压入栈中
- 执行 IRET
- 弹出堆栈上的堆栈指针作为任务 0 的用户栈指针
- 恢复任务 0 的 EFLAGS
- 弹出 CS:EIP 从而开始执行任务 0 的代码
为了每隔 10ms 切换正在运行的任务:
- 将 8253 的通道 0 设置为每经过 10ms 向 8259 发送时钟中断信号
- ROM BIOS 开机时已经在 8259 中将时钟中断请求号设置为 8
- 在中断 8 的处理函数中执行任务切换操作
- 查看 current 变量中的任务号,如果是 0,就利用任务 1 的 TSS 选择符远跳转到任务 1;反之亦然
- 每个任务中,将字符的 ASCII 放入寄存器 AL,调用系统调用中断 int 0x80
- 中断处理程序调用一个字符写屏子程序,将 AL 中的字符显示在屏幕上,同时记录字符显示的下一个位置
- 使用循环语句延迟一段时间,继续循环执行,直到 10ms 时间片用尽
任务 0 的字符始终为 A,任务 1 的字符始终为 B